Surogate DMS capture quickstart
This page takes you from a stack of paper to filed documents: you make a channel and a flow, print separator sheets, scan a stack, check how the DMS cut it, and file it. It takes about twenty minutes.
The pictures were taken in a demo city hall, Example City Hall, with made-up people and documents. You are Elena Marin, the administrator, for steps 1 to 4, and then Andrei Ionescu, the registry clerk, for steps 5 to 10.
You need:
- the Quickstart for administrators done: the org chart, the folders, the nomenclator and the document types Application and Petition;
- for Elena, Manage capture for the whole institution, which the Archive administrator role holds;
- for Andrei, Process captures in the Registry Office, which the Registrar role holds. The role also holds Access to documents with personal data, which the inbox needs;
- a scanner that saves a PDF, or a phone that takes photographs.
1. Make the separator sheet profiles
Section titled “1. Make the separator sheet profiles”Open Administration › Separator sheets and choose New profile. Write the Name Applications, choose the Document type Application, leave the Folder at The channel’s folder and the Template at No template, and choose Save.
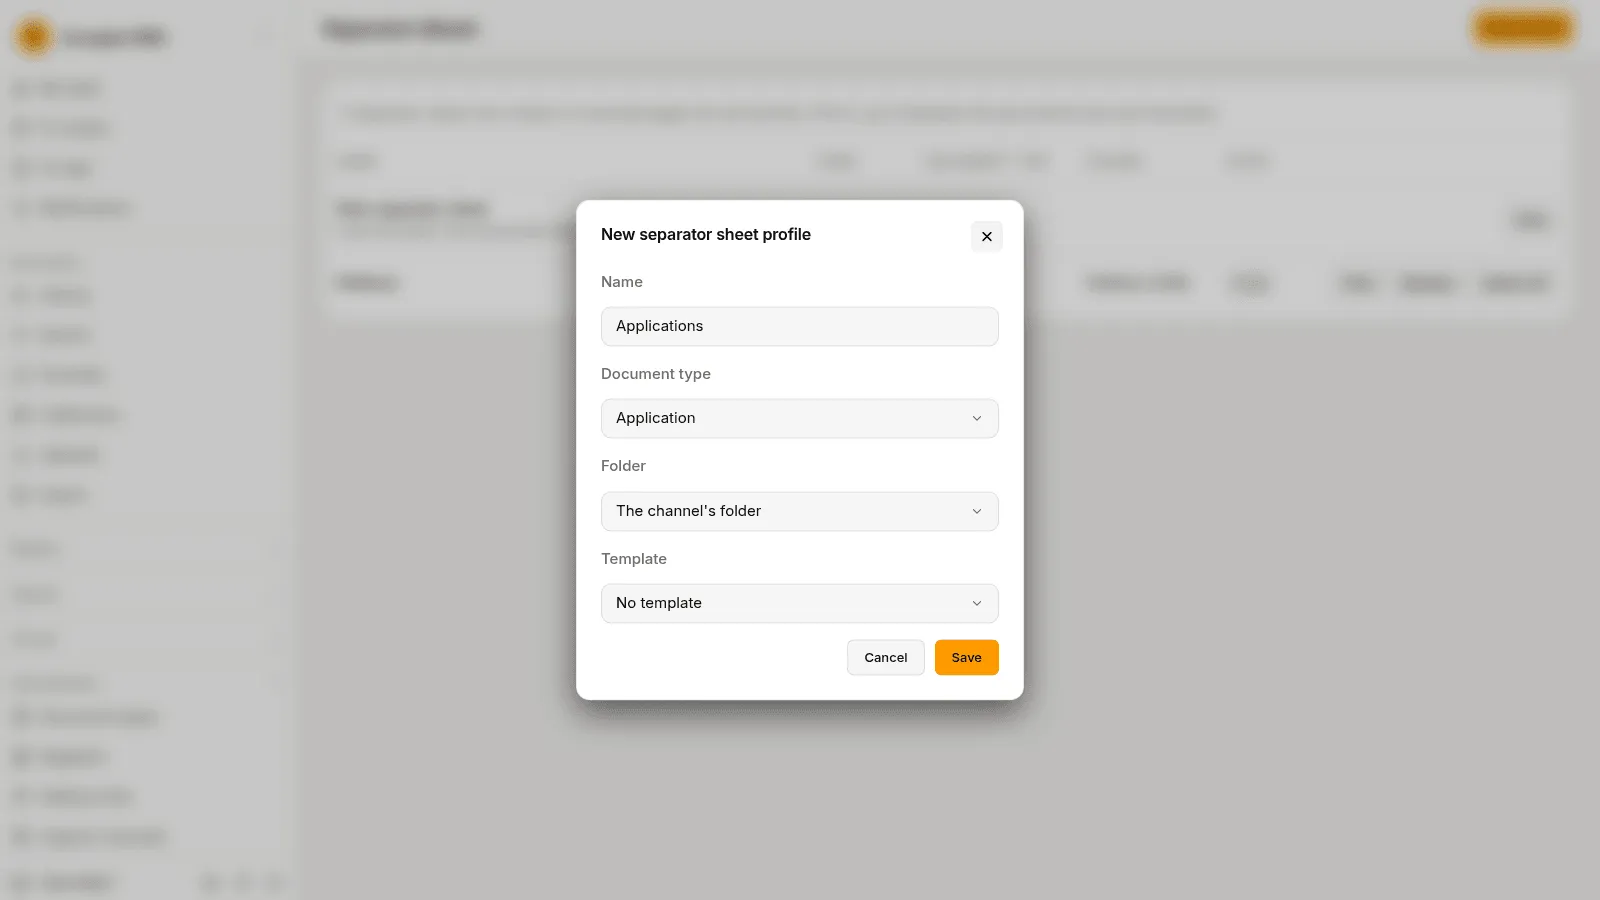
The page says “The profile was made.” and gives the code of the sheet. Make a second profile named Petitions in the same way, with the type Petition. A sheet of a profile starts a new document and says what that document is. See Separator sheets and registration labels.
2. Make a channel
Section titled “2. Make a channel”Open Administration › Capture channels and choose New channel. Choose Web upload as the Kind of channel. Write the Name Registry Office desk, choose the Unit Registry Office and the Default folder Registry Office, and choose Save.
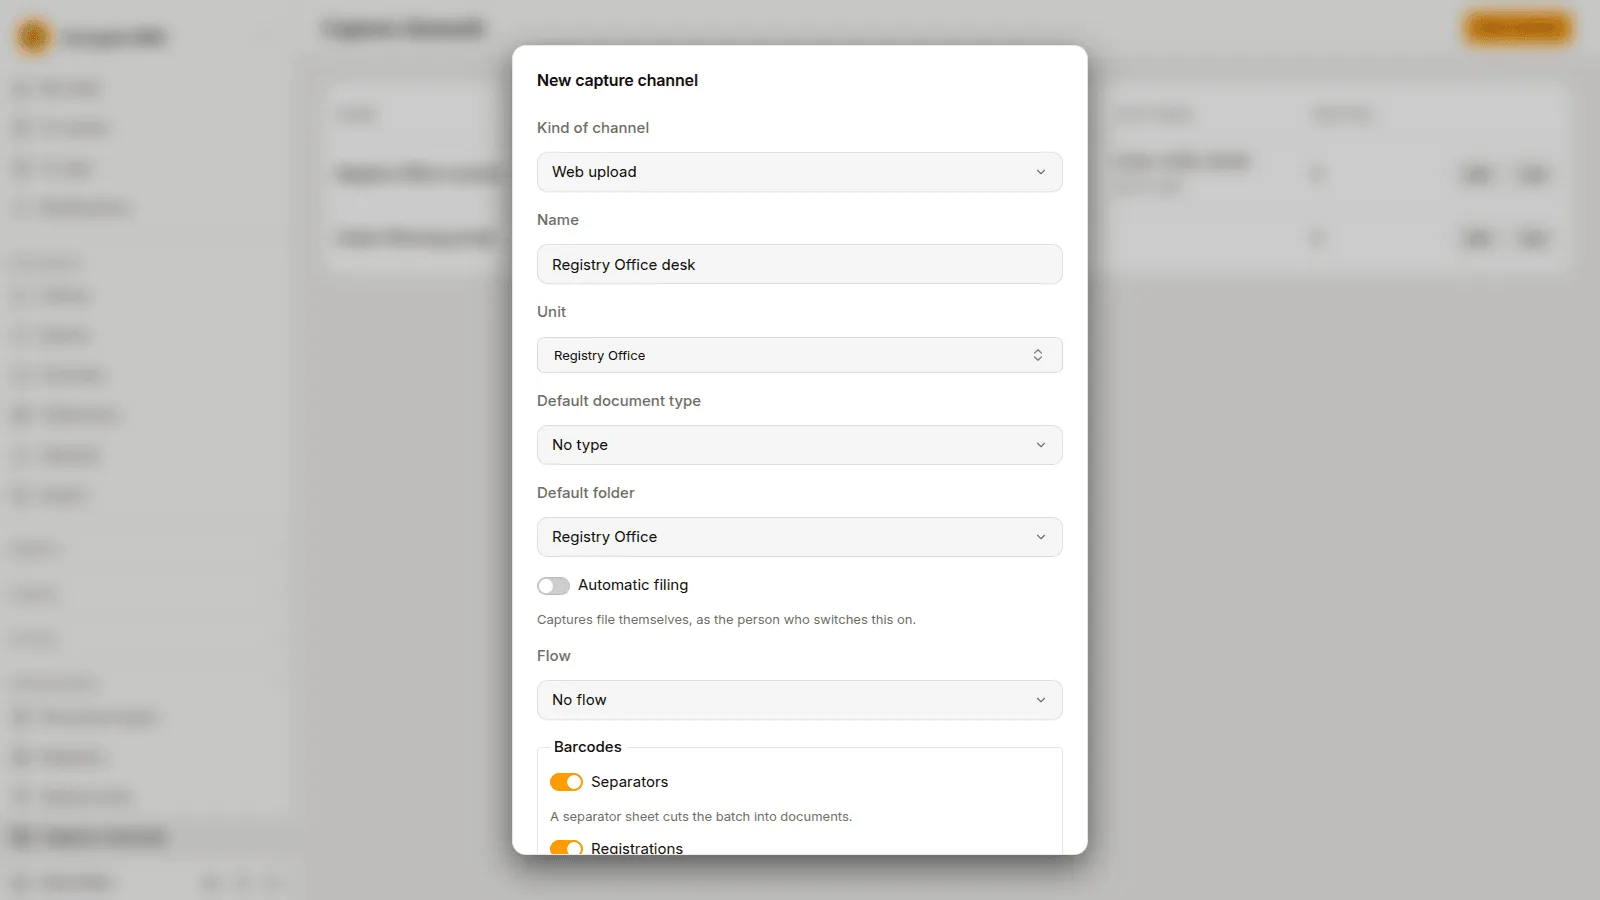
The channel is now in the list, Active. It is the destination Andrei will choose when he sends a stack. See Capture channels.
3. Draw a flow
Section titled “3. Draw a flow”A flow says what the DMS does with the captures of a channel.
- Open Administration › Capture flows and choose New flow.
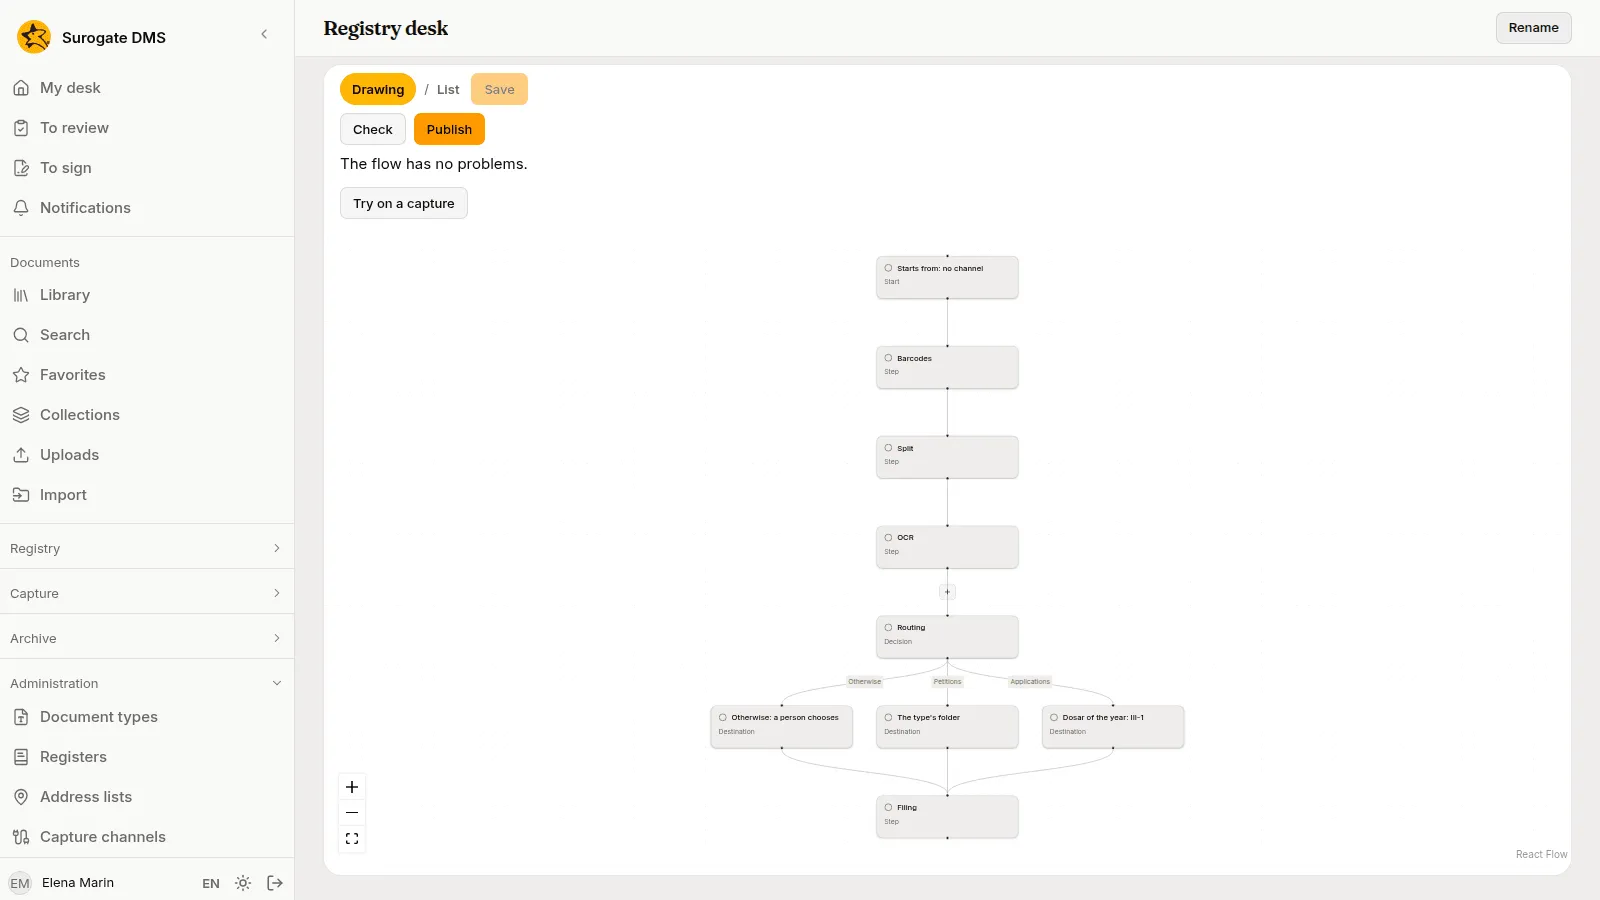
- Write the Name Registry desk and choose Create. The new flow opens with the two steps every flow has: Split and Filing.
- Choose List in How the flow is shown.
- Choose Add a step and add Barcodes. Add OCR and Routing in the same way. The steps keep their order.
- In Routing, choose Add a rule and write the Name Applications.
- Under When, choose all the conditions fit, and choose Add a condition.
- Choose the Fact The separator sheet and the Operator is. Write the code of the Applications profile as the value. You copy it from the Code column of Separator sheets.
- Under Then, choose the Destination The dosar of the year of a position, the Unit Urban Planning Department and the Position III-1 Building permits.
- Write the Title
Application received on {date}. - Add a second rule named Petitions. Its condition is the code of the Petitions profile, its Destination is The type’s folder, and its Title is
Petition received on {date}. - Leave Otherwise at a person chooses the folder, and Filing at A person files.
- Choose Check. The page says “The flow has no problems.”
The sheet already gives each document its type, so the rules do not set it. Choose Drawing to see the flow.
See Capture flows.
4. Publish it, switch it on and give it to the channel
Section titled “4. Publish it, switch it on and give it to the channel”- Choose Publish, write a Note such as First version, and choose Publish in the dialog.
- Choose Switch on.
- Open Capture channels and choose Edit on Registry Office desk.
- Choose the Flow Registry desk and choose Save.
From now on, a capture sent to that channel runs the flow. A capture keeps the version of the flow it started with.
5. Print the sheets
Section titled “5. Print the sheets”Now you are Andrei. Open Capture › Separator sheets.
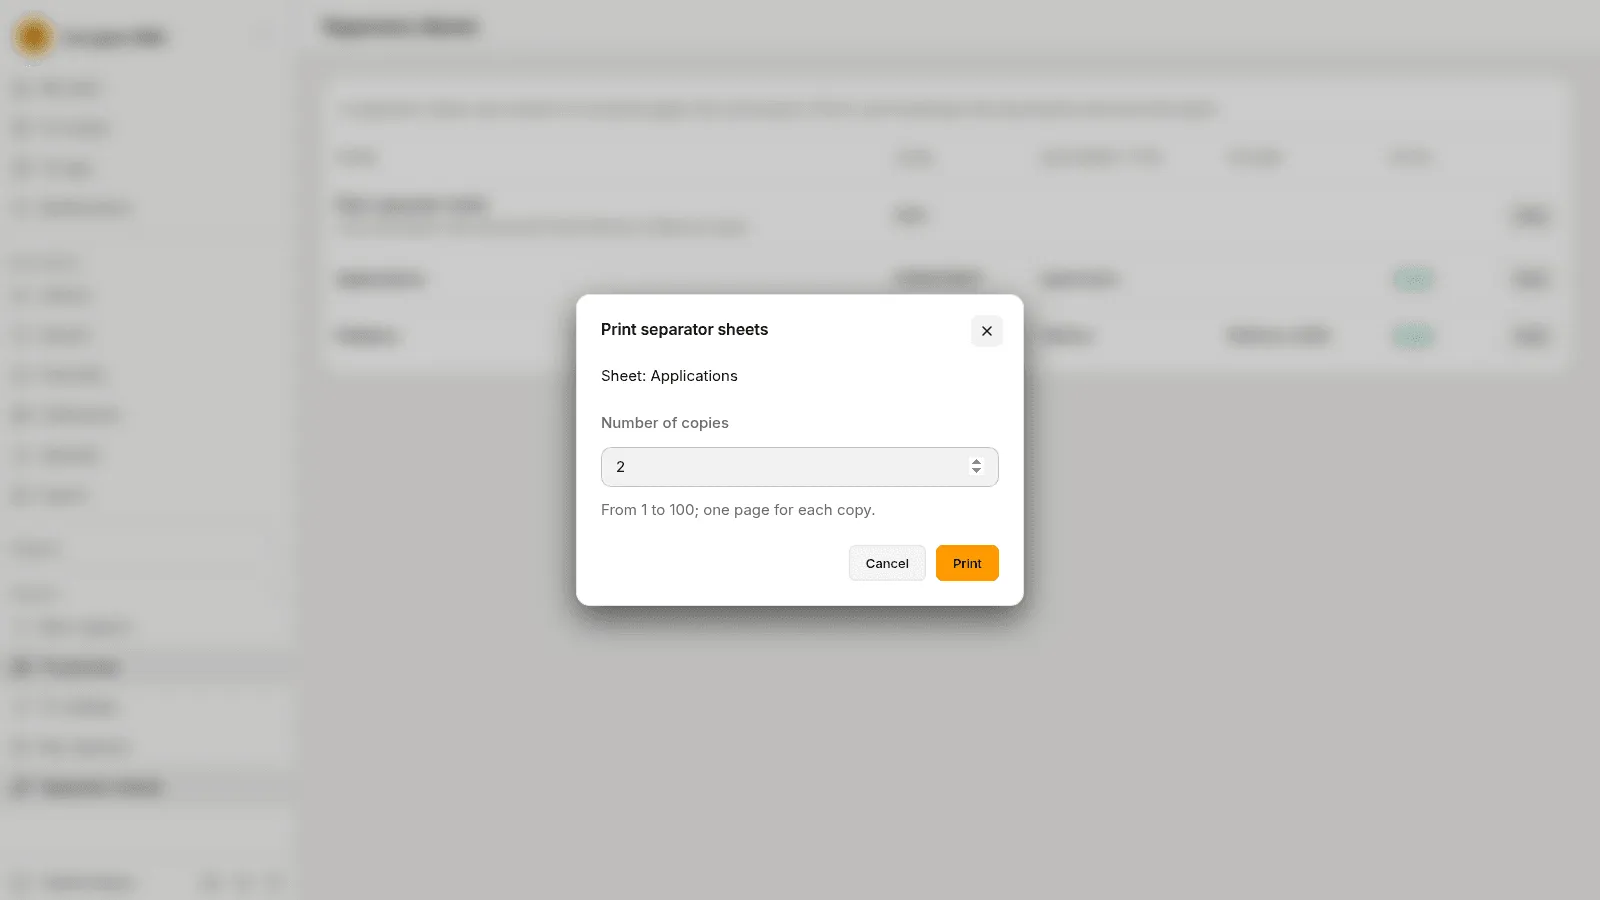
- Choose Print on Applications. The stack in this quickstart has two applications, so write 2 in Number of copies.
- Choose Print in the dialog, and print the PDF at full size.
- Print one copy of Petitions in the same way.
Do not write on the sheets.
6. Scan the stack and send it
Section titled “6. Scan the stack and send it”Put the stack together with a separator sheet before each document: an Applications sheet and an application of one page, an Applications sheet and an application of two pages, and a Petitions sheet and two petitions of one page each. Put no sheet between the two petitions. Scan the stack to one PDF of eight pages.
- Open Capture › New capture.
- Choose Registry Office desk in Destination. Do it first: the destination cannot change once the first file is chosen.
- Choose Choose files and choose the PDF.
- Write the Title Morning post.
- Choose Submit.
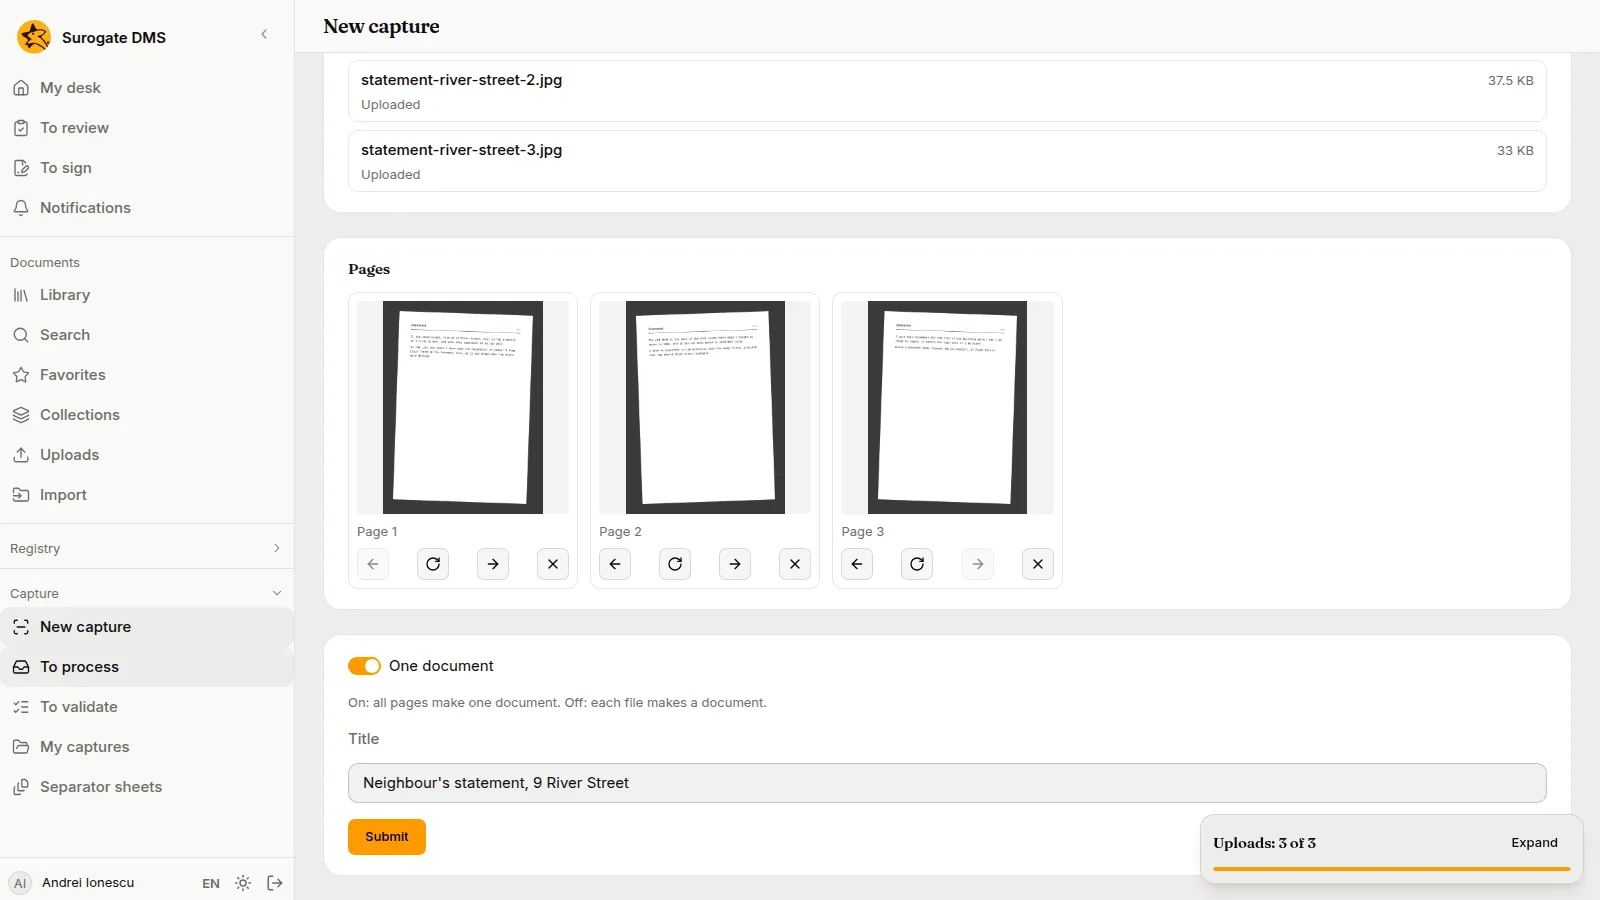
The picture shows three photographs, as a phone sends them. A scanned stack is one file, and the list Files shows that one file. See Capturing documents.
7. Watch it being read
Section titled “7. Watch it being read”After Submit, the page of the capture opens. It says where the capture is: Waiting, then In progress with the step it is working on. The page refreshes by itself.
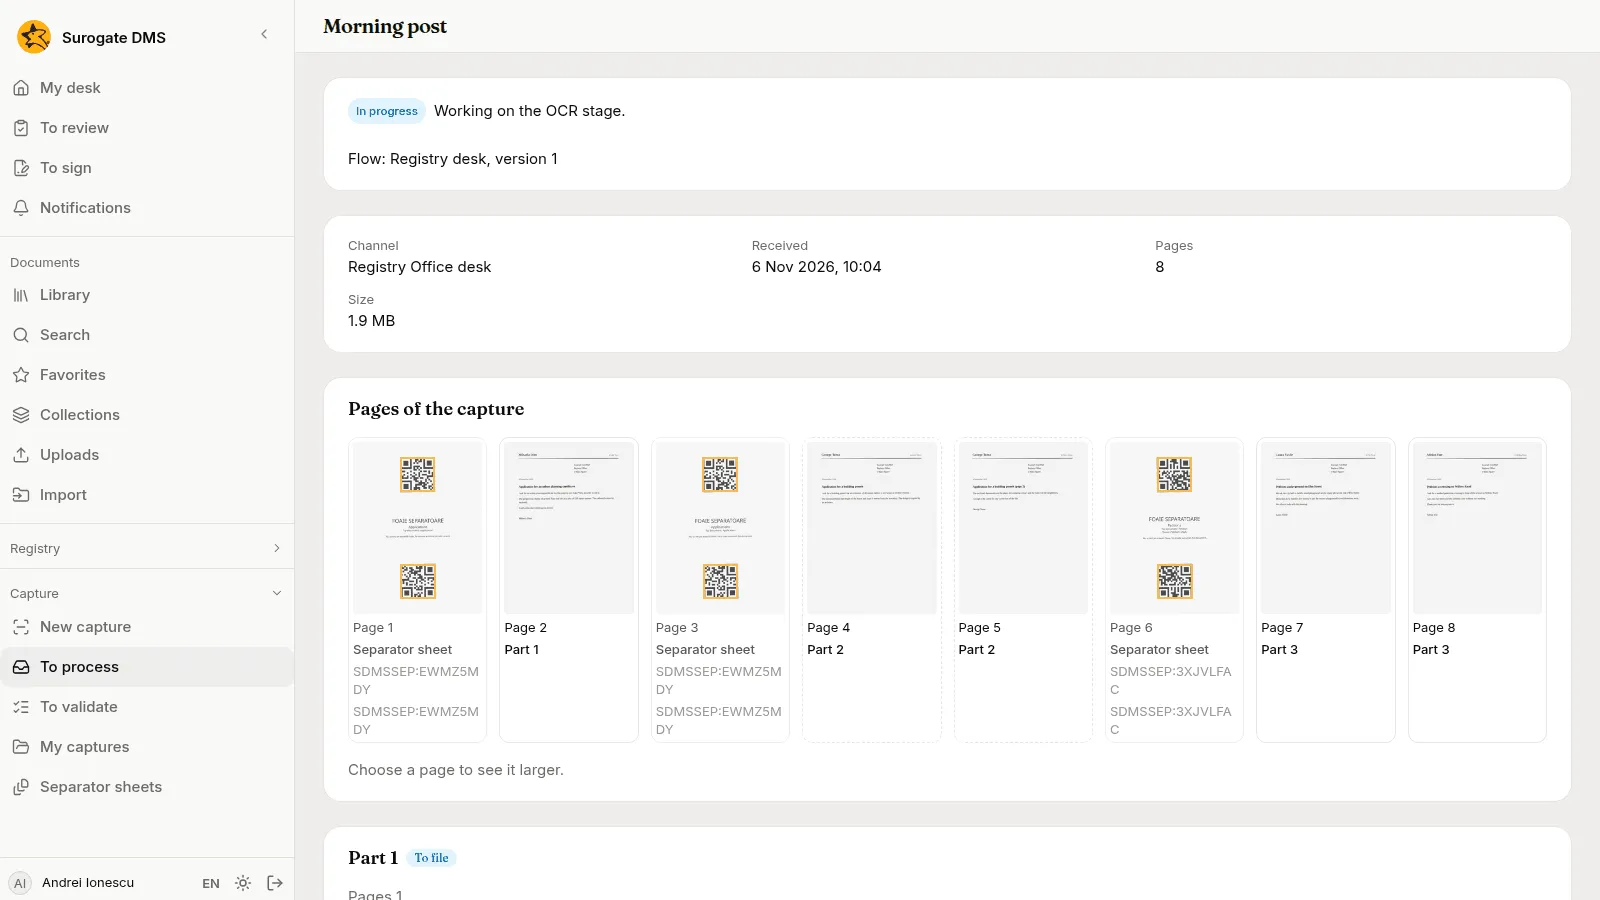
When the DMS has read the pages, the state becomes Ready to file.
8. Check the parts and split one
Section titled “8. Check the parts and split one”Open Capture › To process and open Morning post. Under Pages of the capture, check what the DMS did.
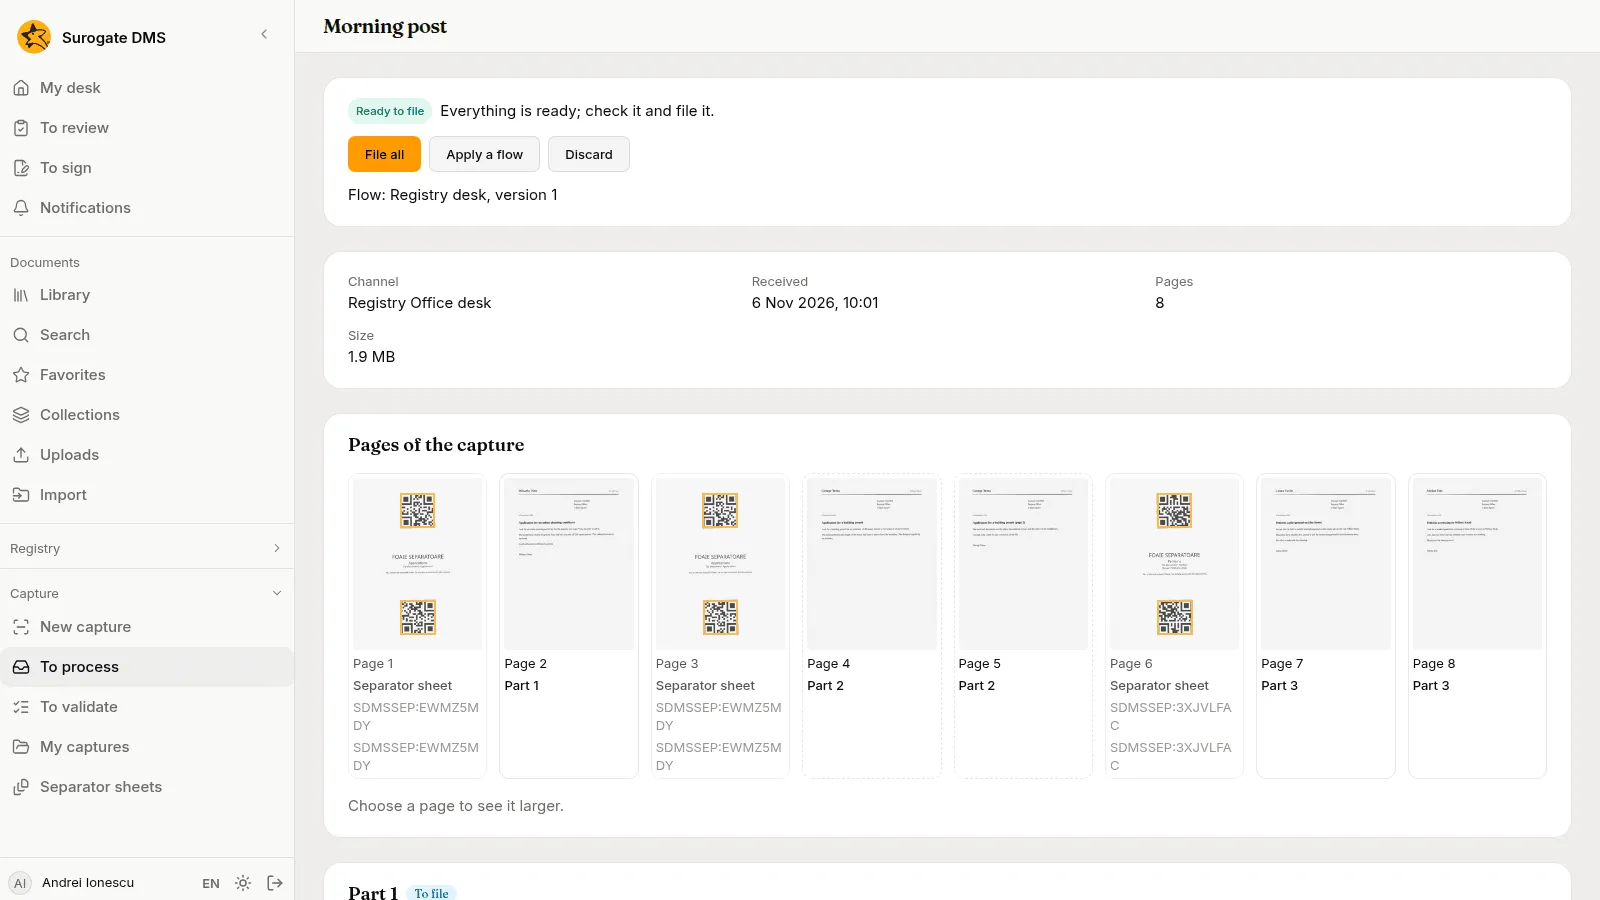
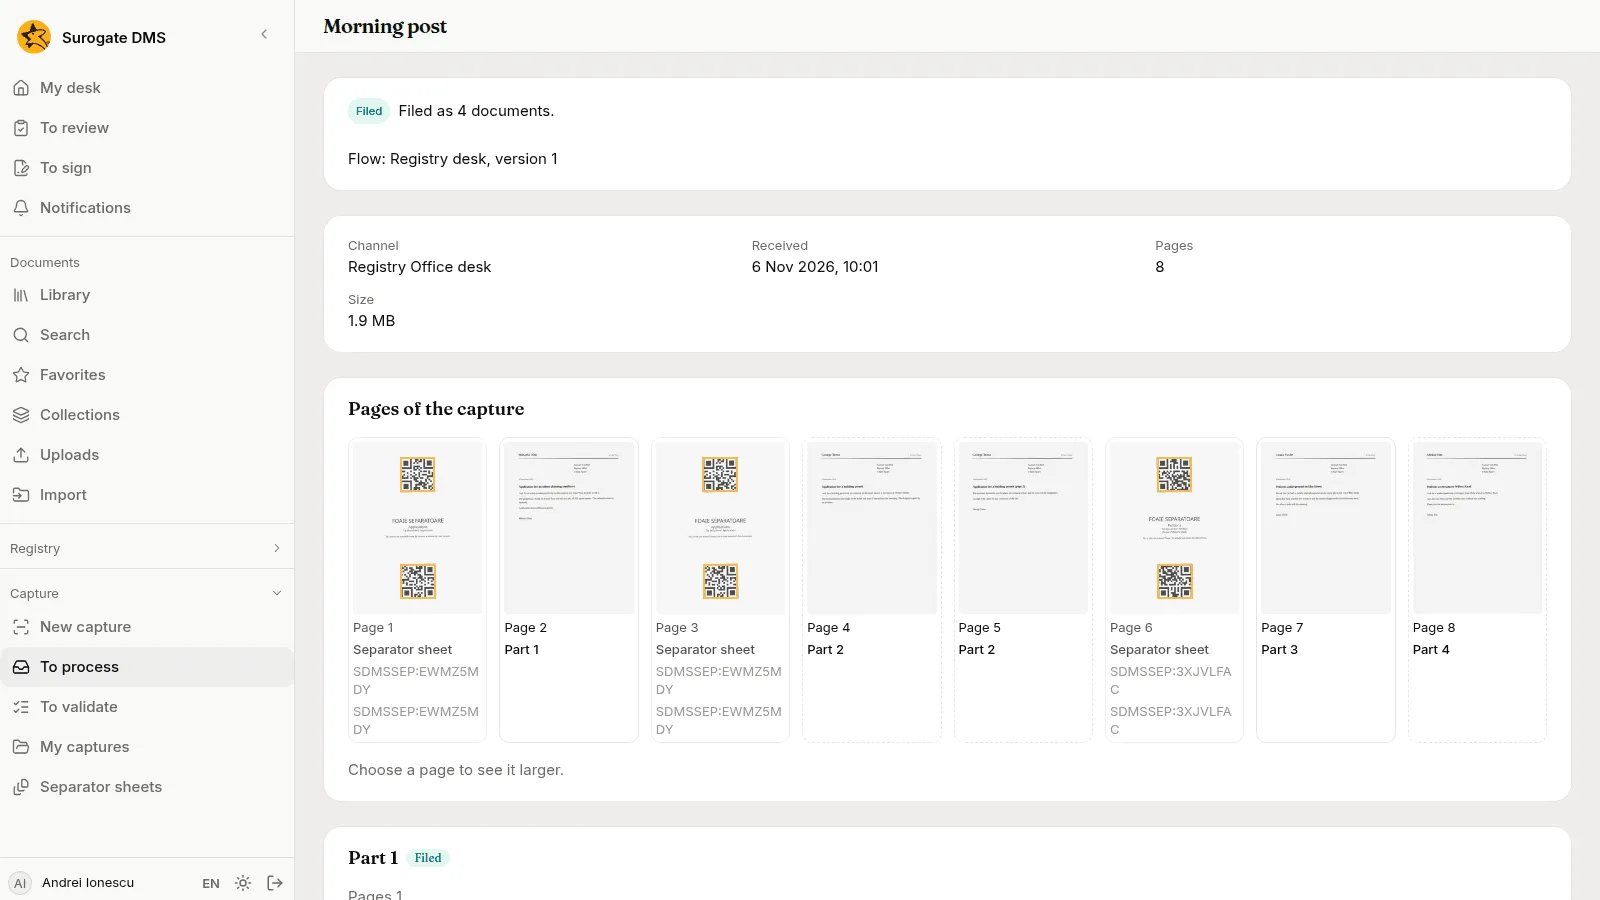
Pages 1, 3 and 6 are marked Separator sheet. They are left out of the documents. Page 2 is part 1, pages 4 and 5 are part 2, and pages 7 and 8 are part 3. Part 3 holds the two petitions, because no sheet lay between them. Each part’s card says Rule “Applications” or Rule “Petitions”, and shows the title and the folder the rule chose and the type the sheet gave.
- Choose Split on the card of part 3.
- Click between the two pages, and check that the dialog says “2 parts are made.”
- Choose Split.
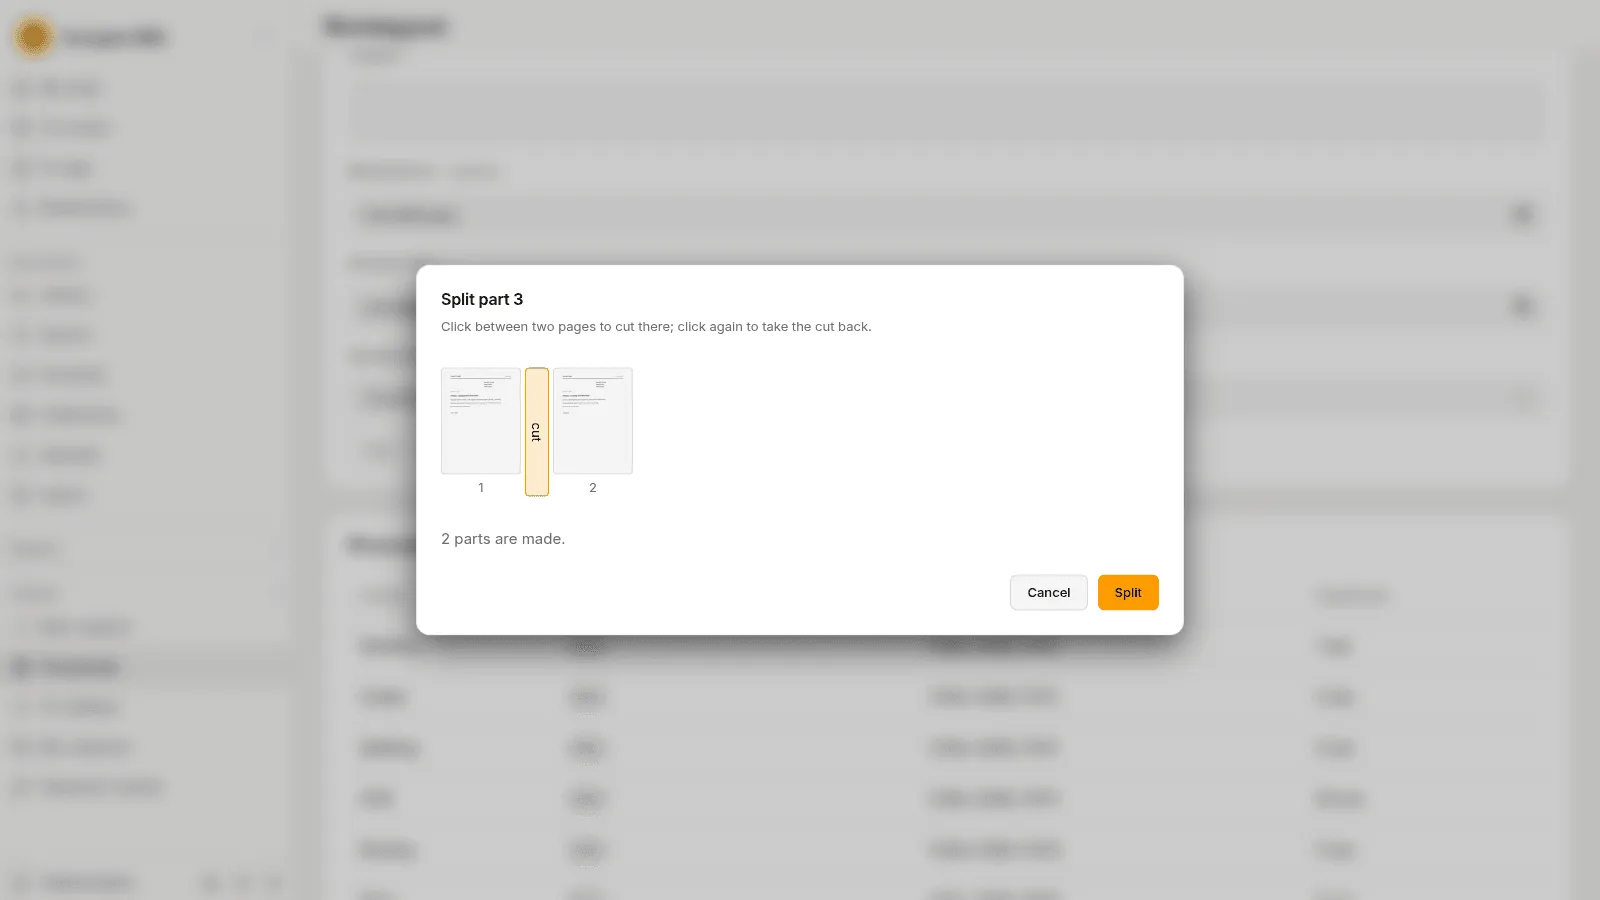
The capture is read again. When it says Ready to file once more, it has four parts.
9. File the capture
Section titled “9. File the capture”Choose File all. The page says “Filed as 4 documents.” Each part shows Filed and Open the document.
10. Find the documents
Section titled “10. Find the documents”Open Library. The two applications are in Urban Planning Department › Building permits 2026, titled “Application received on” and the day of the capture. The two petitions are in General Secretariat › Petitions 2026. Each document says in its header that it was captured through Registry Office desk.
Next steps
Section titled “Next steps”- Example: scan a day’s incoming mail, with registration labels, a form read with a template and a flow that files by rules.
- Processing captures, for what to do when a capture waits.
- Capture templates, to read the data of a form.
- Capture flows, for the rules and the check.